If you have been applying foundation with your fingers and wondering why your base looks uneven by midday, the answer might be simpler than you think. The tool you choose matters just as much as the formula you select – and according to professional makeup artists, a well-structured makeup sponge is one of the most effective ways to build a finish that actually holds up through the day.
We spoke with three New York City-based celebrity makeup artists – Christian Briceno, Tim Quinn, and Kasey Spickard – about the right way to use a makeup sponge for foundation application. What they shared was more nuanced than the basic "bounce it on your face" advice you might have heard before.
What a Makeup Sponge Actually Does
"A makeup sponge is one of those simple tools that can completely change the way foundation looks on the skin," says Quinn. Unlike a brush or bare fingers, a sponge helps diffuse product so that it melts into the skin rather than sitting on top of it. The result is softer, more natural-looking coverage – the kind that reads as skin rather than a mask.
Briceno puts it this way: "What I particularly like about sponges is that they let me work with very thin layers, soften transitions between areas with more and less coverage, and gently lift excess product without disturbing the rest of the makeup." That ability to build in incremental layers is what keeps a foundation finish looking fresh rather than cakey as the hours pass.
It is worth noting that a sponge leans toward a natural-to-medium finish by design. If you are chasing a heavy, full-coverage look, a sponge alone may not get you there – but that is not necessarily a flaw. As Quinn puts it: "I've always believed the most beautiful foundation is the foundation you barely notice."
Wet or Dry? The Answer Is Clear
Every artist interviewed agreed on this without hesitation: always use a damp sponge. A dry sponge will absorb too much product, leaving your application patchy and your coverage inconsistent.
"Not soaking wet, just slightly damp," Quinn explains. "I like to wet it, squeeze out the excess water, and then give it another squeeze in a clean towel." That final squeeze in a clean towel is a small but meaningful step – it ensures the sponge is moist enough to glide and blend, but not so saturated that it dilutes your foundation or prevents proper adherence to the skin.
A dry sponge can, in theory, deliver more concentrated coverage in targeted spots, but you will sacrifice the soft, filtered quality that makes sponge application so appealing in the first place.
Step-by-Step: How to Apply Foundation With a Sponge
Step 1: Dispense Foundation onto the Back of Your Hand
Rather than applying foundation directly to your face or the sponge, Quinn recommends starting by placing a few drops of product on the back of your hand. "This allows you to control exactly how much product you're using," he says. It also gives you a clean surface to pick up from at your own pace without the formula drying on your skin or sponge prematurely.
As for formula, a liquid foundation pairs best with a sponge – stick formulas can be more difficult to blend with this method. Look for options that include skin-friendly ingredients like hyaluronic acid and niacinamide, which hydrate and help calm redness and uneven tone while you wear them. Standout options currently on the market include M.Ph by Mary Phillips Le Skin Weightless Serum Foundation, Armani Beauty Luminous Silk Perfect Natural Glow Foundation, Tarte Face Shape Foundation, and the budget-friendly Maybelline Super Stay Up to 24HR Skin Tint.
Step 2: Use a Brush to Place the Product First
This step surprises many people, but it makes a significant difference. Before the sponge even touches your face, use a dome-shaped foundation brush to dot product from the back of your hand onto your skin. "Dab your foundation brush into the product and begin applying it to the center of the face, where most of us need a bit more coverage, working outward," Quinn says.
The key word here is dot – not drag, not swipe. Dotting places the product where you need it without spreading it too thin or pulling it across dry patches. This step sets up the sponge to blend rather than redistribute.
Step 3: Tap and Build With the Sponge
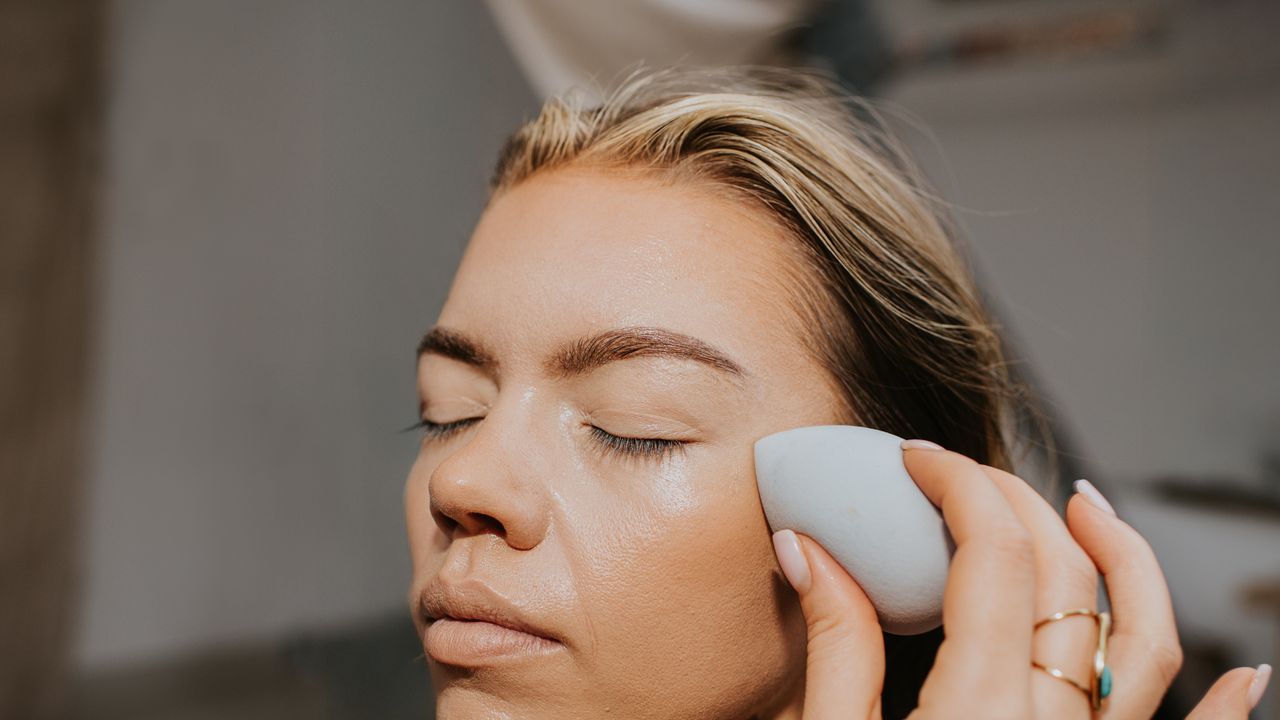
Now the sponge takes over. Using the larger, rounded end of a damp sponge, work with a bouncing or stippling motion – pressing and lifting rather than dragging across the skin. "Use a bouncing or stippling motion to blend out the product, then build coverage wherever you need more," says Spickard.
This technique blends without stripping. The porous texture of the sponge picks up and deposits product at the same time, which is exactly why the finish looks so even.
The pointed tip of the sponge serves a different purpose: getting into tighter areas around the nose and under the eyes. "I always use whatever product remains on the sponge toward the jawline and hairline to blend everything in," Quinn adds – a smart way to avoid a visible foundation line without wasting extra product.
Always start with a clean sponge. Product and moisture trapped in a sponge are a breeding ground for bacteria, which can contribute directly to breakouts. The Beautyblender Original Pink Makeup Sponge, the Real Techniques Miracle Complexion Sponge, and the e.l.f. Total Sponge Set are all well-regarded options across different price points.
Step 4: Build, Conceal, and Set
Repeat the stippling motion until you reach your desired finish. "Remember, you don't need the same amount of makeup everywhere. Some areas might need more coverage, while others need almost none," says Briceno. Apply concealer only where you genuinely want to obscure something specific – a blemish, discoloration, or dark circle – rather than layering it uniformly across the face.
Once you are happy with your coverage, set the look with a light application of setting powder followed by a 24-hour setting spray. Spickard has a finishing trick worth adopting: "I also like to take a damp beauty sponge after spraying to work the setting spray into the skin and lock the makeup in even more securely." This extra press with the sponge melds all the layers together and helps your base last significantly longer. Look to One/Size by Patrick Starrr On 'Til Dawn Mattifying Waterproof Setting Spray or Tirtir Maskfit Waterproof Setting Spray for reliable hold.
What to Avoid
- Never use a dry sponge with liquid foundation – the result will be streaky and uneven.
- Avoid rubbing or dragging the sponge across the skin. A bouncing motion is always the right call.
- Do not skip cleaning your sponge regularly. Bacteria buildup is a genuine concern, particularly for anyone prone to congestion or breakouts.
- Resist the urge to apply too much product at once. Thin layers that build gradually will always outperform one heavy coat.
With the right technique and a little practice, a makeup sponge can change the way your foundation looks and wears in a way that almost nothing else can replicate.